Azure Private Link allows you to connect to public services over a private connection. I have already written about using Private Link with blob and the Azure Kubernetes Service.
You can also use Private Link to expose your own custom services, and act as a service provider. This means you would build a service in your own subscription and VNET; and then later expose that service to others that want to connect to it using Private Link.
An example of this could be a service provider (think software company offering a SaaS) offering a software service for private over Private Link. You could also imagine a company operating shared services (e.g. monitoring infrastructure) over a Private Link connection rather than VNET peering. Private Link has the benefit of allowing for overlapping IPs, and not requiring any-to-any connectivity like VNET peering.
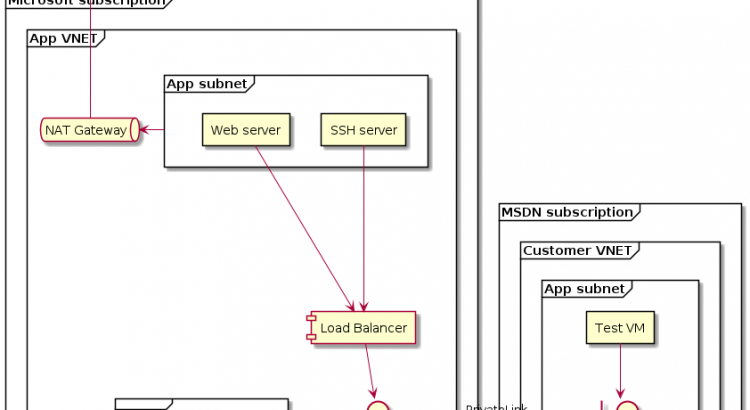
In this blog post we’ll explore setting up a Private Link service, and try to build the architecture detailed in the picture below:
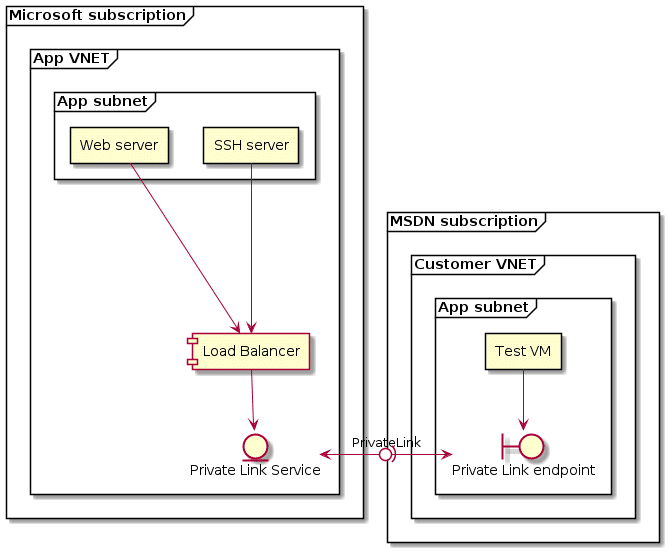
Let me explain what I want to try to build:
- Expose two different services over a single PrivateLink. One will be a web server (port 80) running on one VM. The other will be SSH running another VM.
- I’ll be running the service provider piece of the equation on my Microsoft internal subscription.
- I’ll be running the consumer piece on my MSDN subscription. This has a separate AAD tenant tied to it as well, to mirror as closely as possible a service provider/customer scenario.
I’ll build the base infrastructure quickly using Terraform, and then deploy Private Link using the portal.
Before building this out, let’s have a look at the service details and what needs to be built in order to build this architecture.
What does it take to build a Private Link service?
An Azure Private Link service allows you to share your services privately with other Azure customers. You need to expose your services on a standard load balancer to be able to create a Private Link Service.
After creating the Standard Load Balancer you would create the Private Link service. When you create this service, you need to provide a subnet for NAT IP addresses. You can have between 1 and 8 NAT addresses.
The service then outputs an alias and URI. You need to pass this alias or URI to your customer to enable them to create the Private Link endpoint in their VNET.
Once your customer has that alias or URI, they can create the Private Link endpoint in their VNET. You as a service provider need to approve their request to access your service via Private Link. You could configure auto-approve if you so desire.
And that’s what it takes to build a Private Link service. This sounds easy enough. Let’s have a look if it really is that easy to build:
Setting up the base infrastructure on the service provider side
To set up the base infrastructure, I wrote a Terraform template that you can find on GitHub. To deploy this, you need to have terraform locally and then run:
terraform init
terraform plan -out base.out
terraform apply base.out
One change between the architecture that I wanted to set up and what I built, was the addition of a NAT gateway. Since we’re deploying an internal standard load balancer, there’s no default internet access for those machines. That’s an issue for the web machine, since this one needs to download and install apache2. A simple fix for this was the addition of a NAT gateway.
This made the architecture that we drew up in the introduction slightly different. What we’ll build out in the next few steps will look more like this:
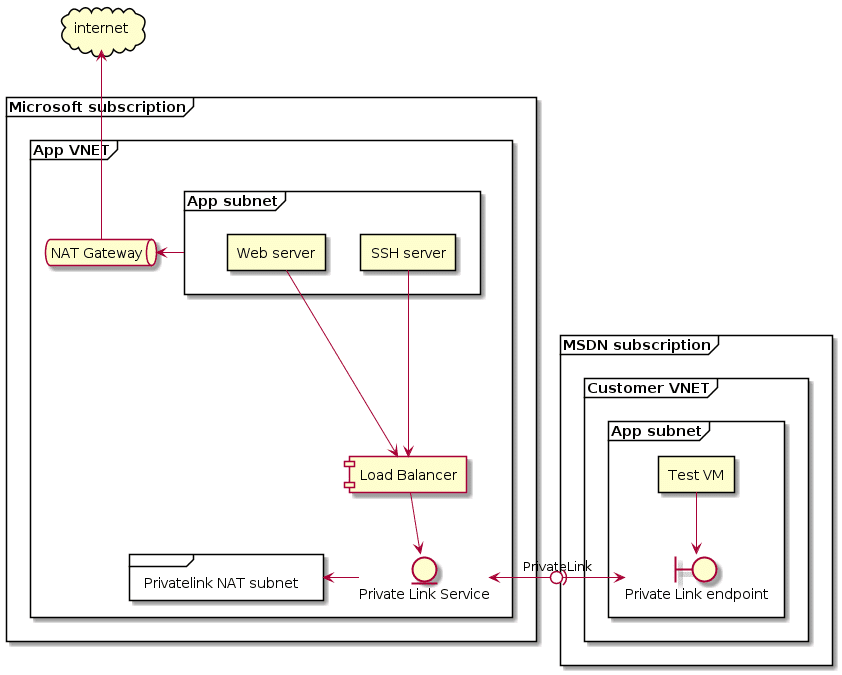
As you can see, we added the NAT gateway to this and a new subnet for the NAT addresses for Private Link. This could have been the workload subnet, but I decided to put those in a separate subnet.
With an updated architecture, we’re now ready to deploy Private Link.
Setting up a Private Link service
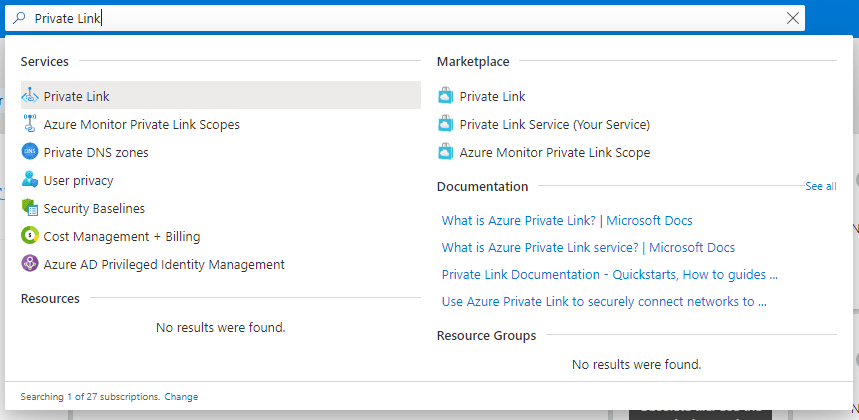
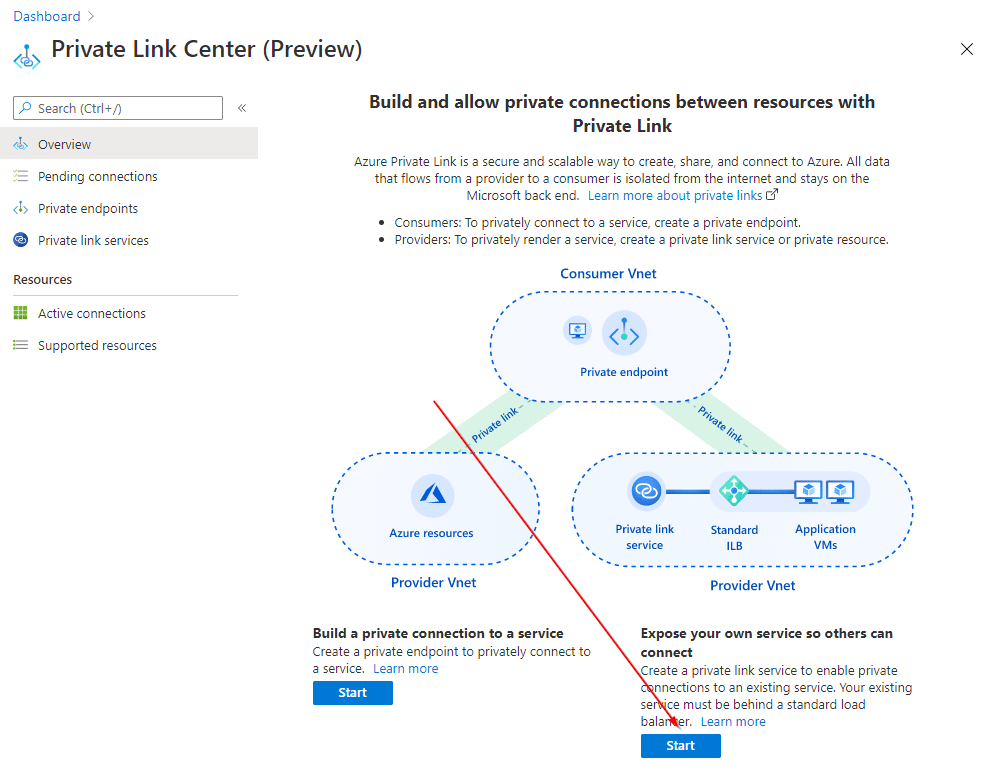
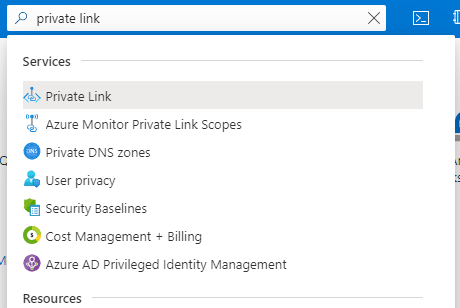
We’ll set up the Private Link service using the portal. Look for Private Link in the Azure search bar.
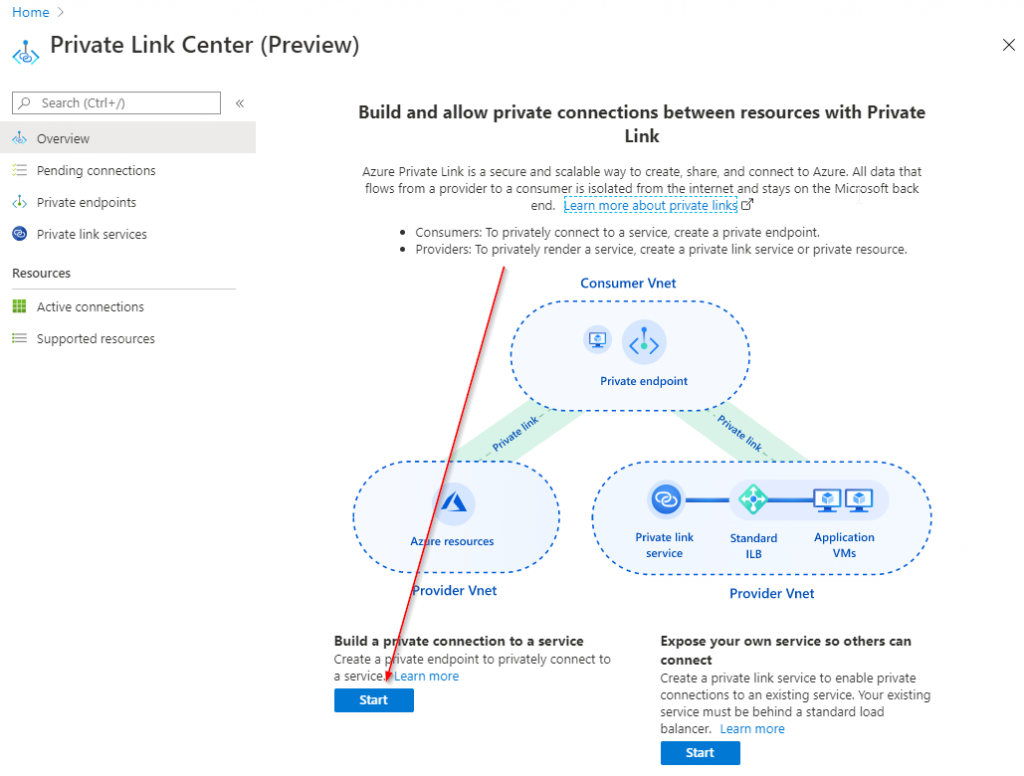
In the resulting portal blade, hit the ‘Start’ button underneath ‘Expose your own service so others can connect’:
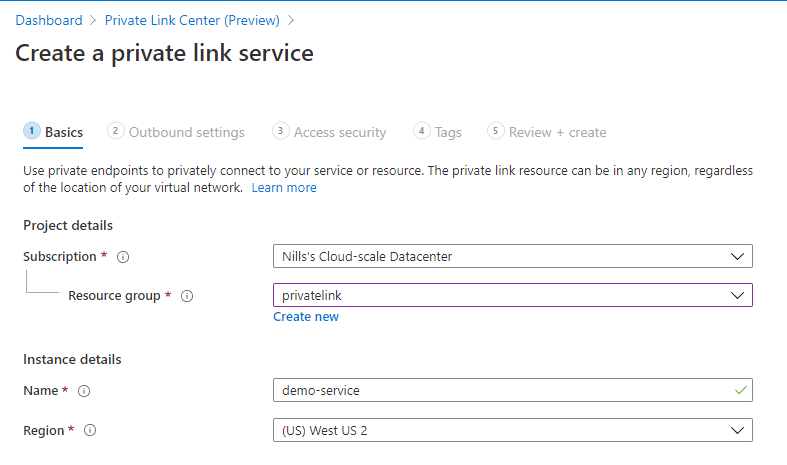
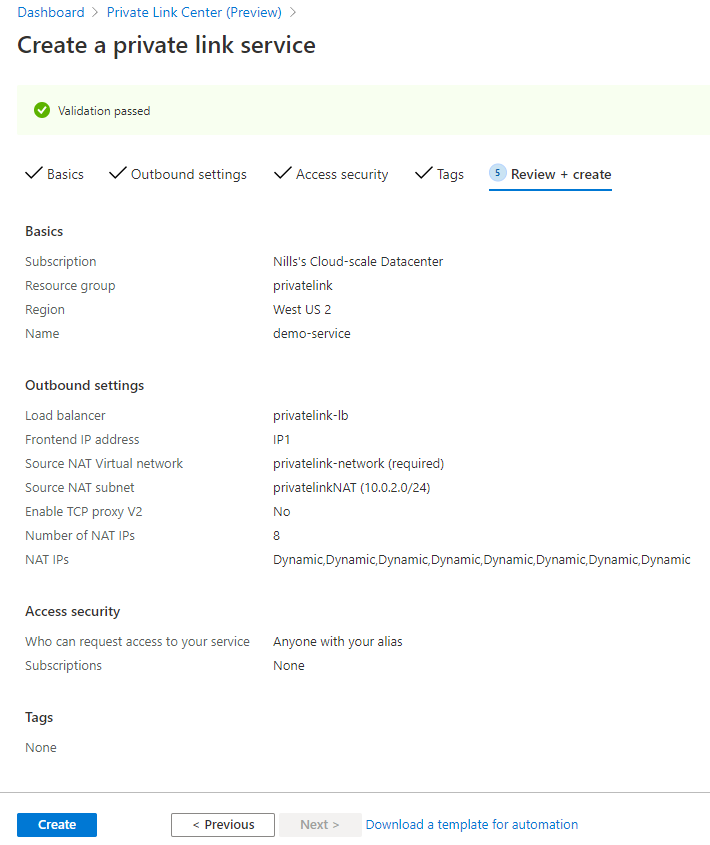
This will take us to the creation process. To start, we’ll need to provide details about the Private Link service resource.
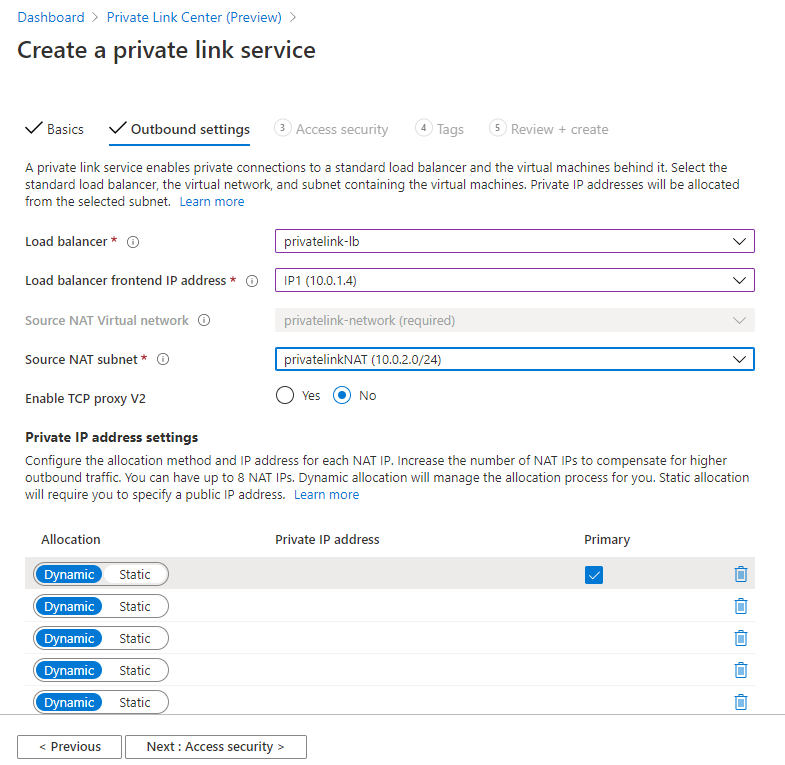
Next, you need to provide the details to the connection itself. You need to provide the load balancer, which front-end IP of the load balancer, the NAT subnet and how many NAT IPs you intend to use. You can use between 1 and 8 IP addresses to do the NAT, with one of those being the primary.
Quick sidenote: I actually got an error when I added 8 IPs. 7 worked though. I created a ticket to file a bug.
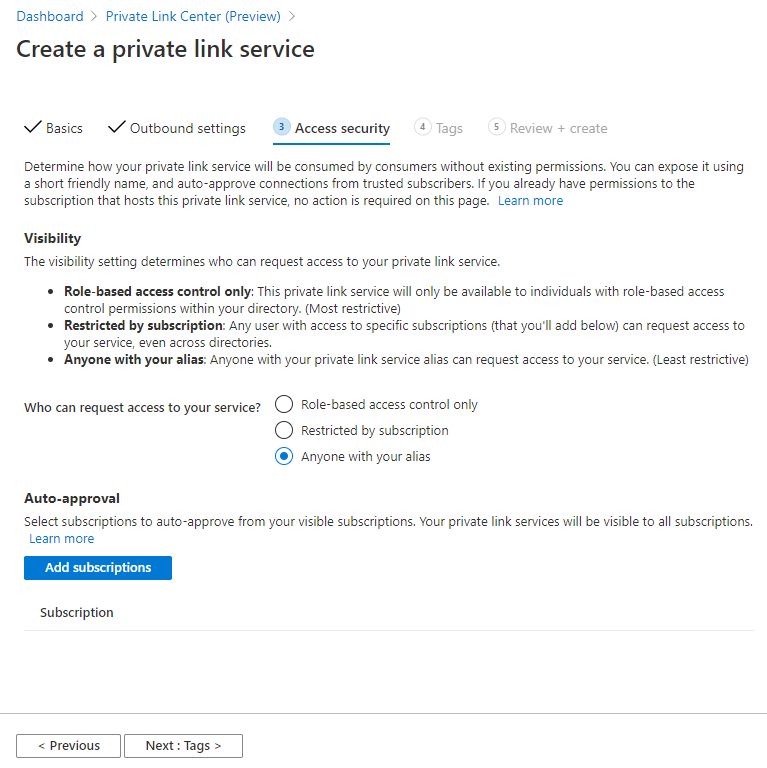
Next up, you need to provide the connection security. This refers to who can create an endpoint based on your service. This can be either of the following:
- RBAC only: Only people with RBAC access to the Private Link service (in your own directory) can create a Private Link endpoint.
- Restricted subscriptions: A restricted list of subscriptions that you provide can create a Private Link endpoint based on your service.
- Anyone with your alias: Anyone with your alias can create an endpoint. You need still need to approve these requests, with optionally auto-approving certain subscriptions.
In my case, I’m going for the most open model without auto-approval.
Final (optional) step is to add some tags. I don’t really care about those in my case, so I’ll skip this step. That leads us to the review and create page, on which we’ll hit the create button:
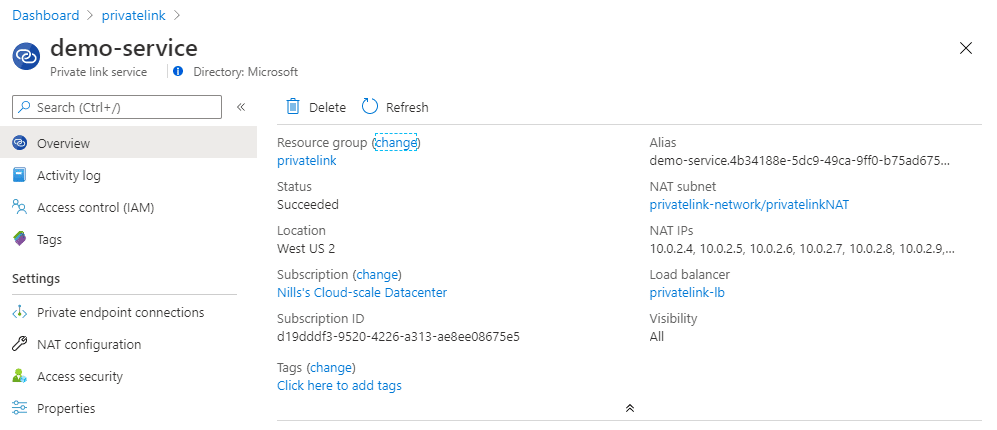
This doesn’t take long to create, and once it’s ready, you can track your service in the portal. We’ll need to alias in the top right to connect from the consumer subscription.
Let’s switch to my MSDN subscription and connect to the private link service.
Creating a Private Link endpoint on the consumer subscription
From a consumer perspective, I created a new VNET and VM for this demo. It’s a simple deployment using the quick-start in the portal.
On the consumer subscription – which in my case is my MSDN subscription, tied to a different Azure AD – we’ll create a Private Link endpoint. To start, look for Private Link in the Azure search bar.
To start the connection, click on the ‘Start’ button underneath ‘Build a private connection to a service’.
First thing we need to define the private endpoint resource details itself.
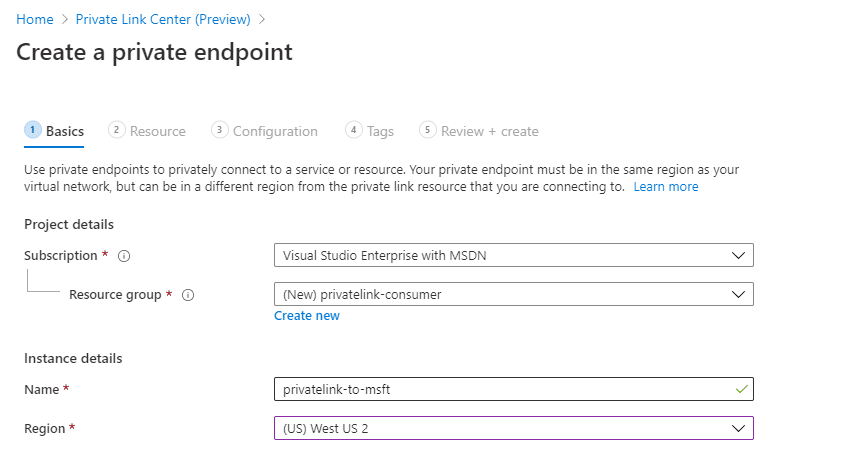
Next, we’ll provide the details for the Private Link resource. Here we paste in the alias:

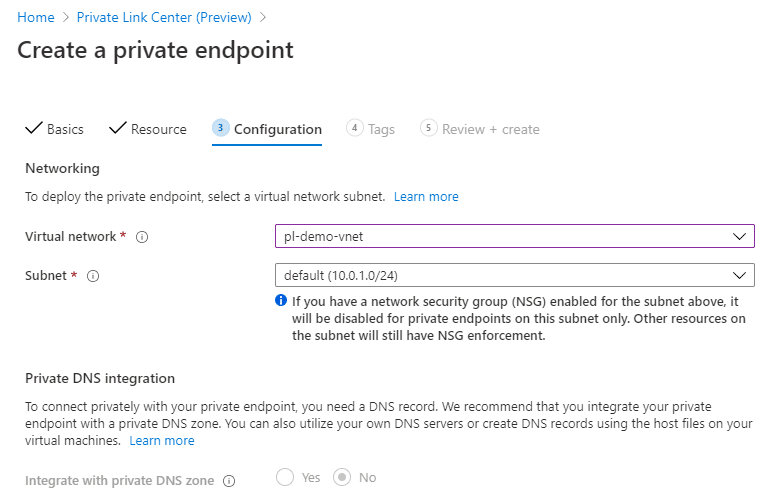
Finally (before the tags that we’ll skip) we will provide the network information on the target network:
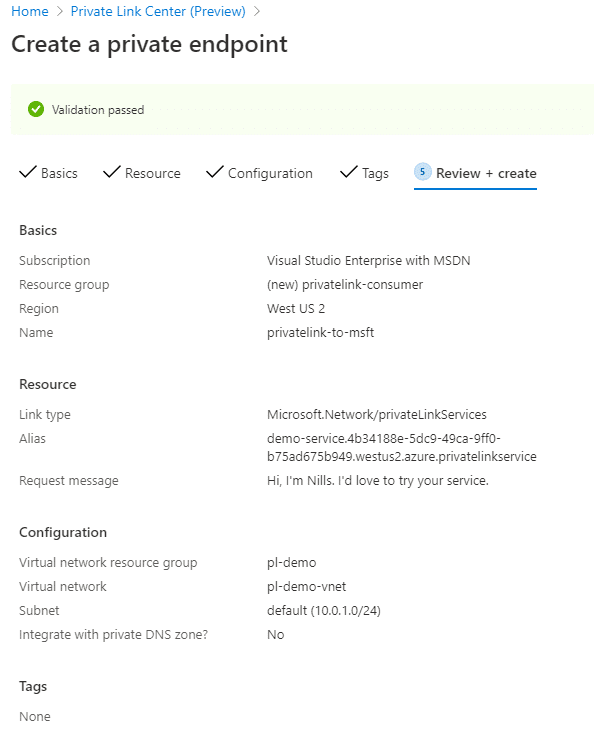
After a quick review, we can create the Private Link endpoint:
This will create the private endpoint – but won’t make it active yet.
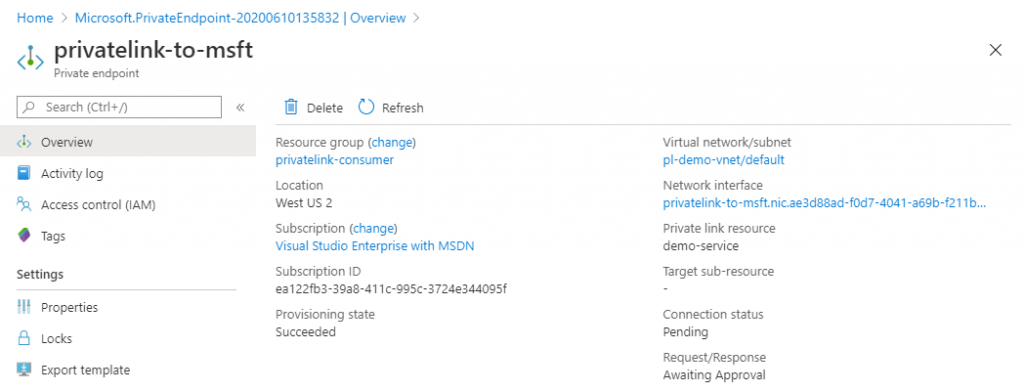
The connection will be in a pending state, and none of the connections work over it.

Allowing the connection request and testing connectivity
If we now head back over to the service provider subscription, we can see the pending request in the private link center.
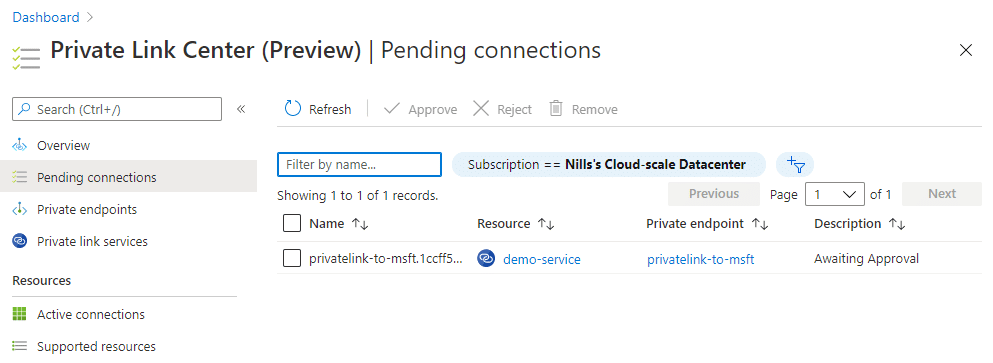
Since I know this person, I’ll go ahead and approve the request. The one thing I find strange is there is no way to see the message that I shared and who the initiating party is. Once I hit approve, I can change the description of the private link resource:

On the consumer side, I could immediately see this change. Including the request/response message.
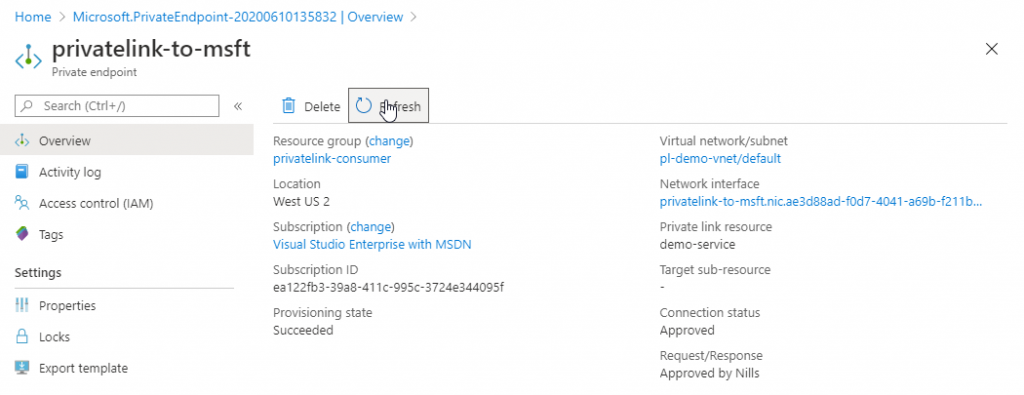
And now that the connection is established, I can connect to the private link services that were exposed. I can connect to both the web server and the SSH server. That means that you can expose multiple services over a single private link service endpoint. In my case this was a web server running on one VM and a SSH server running on another.
Conclusion
In this post, we explored setting up our own Private Link service. We emulated a service provider offering multiple services over one load balancer to its end customers. The end customer was emulated in a different subscription with a different AAD tenant. Once the connection was setup and approved, we were able to connect to the resources over Private Link.
This was easier than I thought to setup. 3 steps on the provider side, 3 steps on the consumer side and then approving the request. I have to say “good job Azure networking team”.