This is part 5 in a multi-series on my CKAD study efforts. You can find previous entries here:
- Part 1: intro, exam topics and my study plan
- Part 2: Core concepts
- Part 3: Configuration
- Part 4: Multi-container pods
- Part 5: Observability
- Part 7: Networking
In part 6, we’re diving into Pod Design, specifically these 4 topics:
- Understand how to use Labels, Selectors, and Annotations
- Understand Deployments and how to perform rolling updates
- Understand Deployments and how to perform rollbacks
- Understand Jobs and CronJobs
If you remember, we discussed Labels, Selectors and Annotations back in part 2, so we’ll skip that topic in this part of the series. Hence, we’ll get started with deployments, and how to perform rolling updates. Let’s get started.
Understand Deployments and how to perform rolling updates
Up to this point in the series, we’ve been primarily using pods to deploy our containers. In a production system however, you rarely deploy an individual pod – you are more likely to deploy a Deployment. With using deployments, you describe your target state in the deployment – and the deployment controller will ensure this target state is reflected in the cluster.
Let’s quickly demonstrate why you would want a deployment, before we create one and do a rolling update.
Let’s start with a basic Nginx pod.
apiVersion: v1
kind: Pod
metadata:
  name: simplepod
spec:
  containers:
  - name: web-server
    image: nginx
Once we create this pod (kubectl create -f simplepod.yaml) , we can see it running using a kubectl get pods. Let’s now try to update our pod, so it contains a volumeMount:
apiVersion: v1
kind: Pod
metadata:
  name: simplepod
spec:
  containers:
  - name: web-server
    image: nginx
    volumeMounts:
      - name: html
        mountPath: /var/www
  volumes:
  - name: html
    emptyDir: {}
We can update our kubernetes items using kubectl apply -f simplepod.yaml. This will give us an error however:
The Pod "simplepod" is invalid: spec: Forbidden: pod updates may not change fields other than `spec.containers[*].image`, `spec.initContainers[*].image`, `spec.activeDeadlineSeconds` or `spec.tolerations` (only additions to existing tolerations)This would mean we need to delete our pod first and then recreate it. Hence the value of a deployment. With a deployment, you update your deployment (your new target state) and the kubernetes system will get you there. Kubernetes will delete the pods that need to be deleted, and create your new ones.
Let’s try this out with our nginx example, while creating a deployment instead of a pod.
apiVersion: apps/v1
kind: Deployment
metadata:
  name: nginx
  labels:
    run: nginx
spec:
  replicas: 1
  selector:
    matchLabels:
      run: nginx
  template:
    metadata:
      labels:
        run: nginx
    spec:
      containers:
      - image: nginx
        name: nginx
We can create this using kubectl create -f deploynginx.yaml. This will create a deployment for us, as well as a replicaset and finally our pods. We can see all three:
kubectl get deployments
NAME    READY   UP-TO-DATE   AVAILABLE   AGE
nginx   1/1     1            1           79s
kubectl get replicaset
NAME               DESIRED   CURRENT   READY   AGE
nginx-7db9fccd9b   1         1         1       82s
kubectl get pods
NAME                     READY   STATUS    RESTARTS   AGE
nginx-7db9fccd9b-t2w6d   1/1     Running   0          85s
simplepod                1/1     Running   0          9m36s
We can then do our update to our deployment, adding the volumemount.
apiVersion: apps/v1
kind: Deployment
metadata:
  name: nginx
  labels:
    run: nginx
spec:
  replicas: 1
  selector:
    matchLabels:
      run: nginx
  template:
    metadata:
      labels:
        run: nginx
    spec:
      containers:
      - image: nginx
        name: nginx
        volumeMounts:
        - name: html
          mountPath: /var/wwws
      volumes:
      - name: html
        emptyDir: {}
And we can update this using kubectl apply -f deploynginx.yaml. To see the real fun in action, I would recommend to do a kubectl get pods --watch in a seperate terminal before doing the updated deployment, to see the fun in action.
kubectl get pods --watch
NAME                     READY   STATUS    RESTARTS   AGE
nginx-7db9fccd9b-t2w6d   1/1     Running   0          3m26s
simplepod                1/1     Running   0          11m
nginx-5b87b8796b-hsbv5   0/1     Pending   0          0s
nginx-5b87b8796b-hsbv5   0/1     Pending   0          0s
nginx-5b87b8796b-hsbv5   0/1     ContainerCreating   0          0s
nginx-5b87b8796b-hsbv5   1/1     Running             0          4s
nginx-7db9fccd9b-t2w6d   1/1     Terminating         0          3m36s
nginx-7db9fccd9b-t2w6d   0/1     Terminating         0          3m38s
nginx-7db9fccd9b-t2w6d   0/1     Terminating         0          3m49s
nginx-7db9fccd9b-t2w6d   0/1     Terminating         0          3m49s
As you can see, the deployment created a new pod for us, and once that new pod was running, terminated our old one. This is a rolling update within Kubernetes. Let’s play around with this some more, shall we?
Let’s scale our deployment from 1 pod to 12 pods. We can do this by either editing the yaml and doing a new apply – we could do a kubectl edit deployment nginx – or, because we’re scaling, we can do this one other way:
kubectl scale deployment/nginx --replicas=12
kubectl rollout status deployment/nginx --watch #to see the updates of the rollout
Waiting for deployment "nginx" rollout to finish: 1 of 12 updated replicas are available...
Waiting for deployment "nginx" rollout to finish: 2 of 12 updated replicas are available...
Waiting for deployment "nginx" rollout to finish: 3 of 12 updated replicas are available...
Waiting for deployment "nginx" rollout to finish: 4 of 12 updated replicas are available...
Waiting for deployment "nginx" rollout to finish: 5 of 12 updated replicas are available...
Waiting for deployment "nginx" rollout to finish: 6 of 12 updated replicas are available...
Waiting for deployment "nginx" rollout to finish: 7 of 12 updated replicas are available...
Waiting for deployment "nginx" rollout to finish: 8 of 12 updated replicas are available...
Waiting for deployment "nginx" rollout to finish: 9 of 12 updated replicas are available...
Waiting for deployment "nginx" rollout to finish: 10 of 12 updated replicas are available...
Waiting for deployment "nginx" rollout to finish: 11 of 12 updated replicas are available...
deployment "nginx" successfully rolled out
If you also did a watch on kubectl get pods, you will have noticed that no single pod was terminated this time. This is because we just scaled our replicaset from 1 to 12 – and didn’t in fact change our pod. Let’s now do a change to our pod design, for instance change from nginx to apache (httpd). Open your yaml file, edit the image to httpd and the replicacount to 12, and then apply the deployment again:
kubectl apply -f deploynginx.yaml; kubectl rollout status deployment/nginx --watchAs you can see in the watching of the rollout status (even better if you watch the kubectl get pods), kubernetes doesn’t update all 12 replicas at the same time. It does so seemingly in batches of pods, creating new ones and then terminating a couple of old ones, and doing so until all 12 are created.
In your deployment configuration, there is a RollingUpdateStrategy; which informs the Deployment Controller how much pods may be unavailable and how much surge is allowed. This is why you see (certainly in the kubectl get pods) that pods get terminated in batches, not all at once.
Understand Deployments and how to perform rollbacks
We’ve done a couple of deployments now, and kubernetes actually keeps a history of our deployments. You can see this via:
kubectl rollout history deploy/nginx
deployment.extensions/nginx
REVISION  CHANGE-CAUSE
1         <none>
2         <none>
3         <none>
Because we’ve been mainly playing around and we haven’t really paid attention to our change-cause, this is empty thus far. Let’s try to get some actual history in there. One option to get history in the rollout, is to use the --record flag when doing the update:
kubectl scale deploy nginx --replicas=6 --recordAnother option is to use an annotation in our deployment file, such as here:
apiVersion: apps/v1
kind: Deployment
metadata:
  name: nginx
  labels:
    run: nginx
  annotations:
    kubernetes.io/change-cause: I wanted a better deployment
spec:
  replicas: 4
  selector:
    matchLabels:
      run: nginx
  template:
    metadata:
      labels:
        run: nginx
    spec:
      containers:
      - image: nginx
        name: nginx
        volumeMounts:
        - name: html
          mountPath: /var/www
      volumes:
      - name: html
        emptyDir: {}
Now we actually see some more history in our rollout history:
kubectl rollout history  deploy/nginx
deployment.extensions/nginx
REVISION  CHANGE-CAUSE
1         <none>
3         <none>
4         kubectl scale deploy nginx --replicas=6 --record=true
5         I wanted a better deployment
And from here, we can safely roll back. Let’s do a simple rollback first:
kubectl rollout undo deploy/nginx #this will undo the latest change
kubectl rollout history deploy/nginx
deployment.extensions/nginx
REVISION  CHANGE-CAUSE
1         <none>
3         <none>
5         I wanted a better deployment
6         kubectl scale deploy nginx --replicas=6 --record=true
As you can see here, we went back from revision 5 to revision 4. However, Kubernetes will always increment the revision counter. Let’s describe our deployment to see some more details:
kubectl describe deploy/nginx
Name:                   nginx
Namespace:              deployments
CreationTimestamp:      Sun, 04 Aug 2019 15:02:23 -0700
Labels:                 run=nginx
Annotations:            deployment.kubernetes.io/revision: 6
                        kubectl.kubernetes.io/last-applied-configuration:
                          {"apiVersion":"apps/v1","kind":"Deployment","metadata":{"annotations":{"kubernetes.io/change-cause":"I wanted a better deployment"},"label...
                        kubernetes.io/change-cause: kubectl scale deploy nginx --replicas=6 --record=true
Selector:               run=nginx
Replicas:               4 desired | 4 updated | 4 total | 4 available | 0 unavailable
StrategyType:           RollingUpdate
MinReadySeconds:        0
RollingUpdateStrategy:  25% max unavailable, 25% max surge
(...)
You can see the deployment counter in the annotations, as well as the last-applied-configuration (which contained our annotation message). We can also roll back to a more ancient revision.
kubectl rollout undo deploy/nginx --to-revision=1
kubectl rollout history deploy/nginx
deployment.extensions/nginx
REVISION  CHANGE-CAUSE
3         <none>
5         I wanted a better deployment
6         kubectl scale deploy nginx --replicas=6 --record=true
7         <none>
Now our we’re back to our first revision, which has become our seventh revision now. This is an easy mechanism to quickly rollback to a known working state.
Understand Jobs and CronJobs
Jobs are another way to create “managed” pods. A job will create one of more pods to finish a certain body of work. By using a job, you can ensure the successful completion of the work.
A Cron Job is a job that runs on a schedule. This is very useful to schedule periodic and recurring jobs. Examples could be taking backups or certain system management tasks (shutting down dev clusters?).
As an example job (this is the same example as on the kubernetes docs), let’s try to calculate pi:
apiVersion: batch/v1
kind: Job
metadata:
  name: pi
spec:
  template:
    spec:
      containers:
      - name: pi
        image: perl
        command: ["perl",  "-Mbignum=bpi", "-wle", "print bpi(2000)"]
      restartPolicy: Never
  backoffLimit: 4
As usual, we can create this using kubectl create -f pijob.yaml. Let’s follow our pods using kubectl get pods --watch.
NAME                     READY   STATUS              RESTARTS   AGE
pi-vpx8r                 0/1     ContainerCreating   0          6s                                                                                    pi-vpx8r                 1/1     Running             0          33s                                                                                   pi-vpx8r                 0/1     Completed           0          40s
We can see the pod is completed, and as long we don’t delete the job, the container will remain available. We can get the outcome from our calculation via kubectl logs pi-vpx8r40s.
We can automate jobs via Cronjobs. Cronjobs in kubernetes are similar to cronjobs in Linux, they even use the same scheduling syntax. If you’re not familiar with that, let me share the scheduling syntax:
# .---------------- minute (0 - 59)
# |  .------------- hour (0 - 23)
# |  |  .---------- day of month (1 - 31)
# |  |  |  .------- month (1 - 12) OR jan,feb,mar,apr ...
# |  |  |  |  .---- day of week (0 - 6) (Sunday=0 or 7) OR sun,mon,tue,wed,thu,fri,sat
# |  |  |  |  |
# *  *  *  *  *
Let’s also look into an example of a Cronjob (again, the example from the kubernetes docs).
apiVersion: batch/v1beta1
kind: CronJob
metadata:
  name: hello
spec:
  schedule: "*/1 * * * *"
  jobTemplate:
    spec:
      template:
        spec:
          containers:
          - name: hello
            image: busybox
            args:
            - /bin/sh
            - -c
            - date; echo Hello from the Kubernetes cluster
          restartPolicy: OnFailure
This CronJob will run every minute and will do a simple echo. Let’s create this using kubectl create -f cronjob.yaml and see what this looks like.
We can see a couple of interesting things here. In the kubectl get pods --watch, we can see pods getting created and completed. You can see that the pod names are all unique:
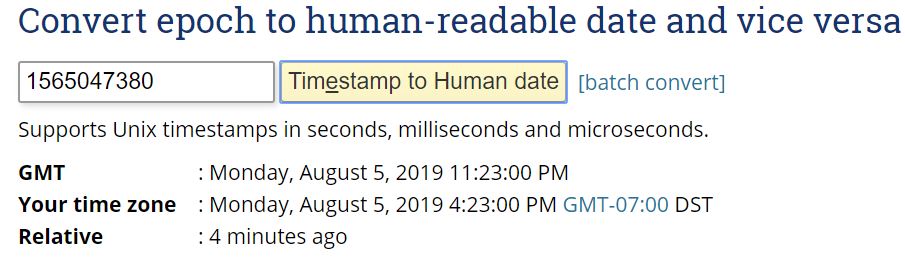
hello-1565047320-bbqq9 0/1 Pending 0 0s hello-1565047320-bbqq9 0/1 Pending 0 0s hello-1565047320-bbqq9 0/1 ContainerCreating 0 0s hello-1565047320-bbqq9 0/1 Completed 0 4s hello-1565047380-jw7mz 0/1 Pending 0 0s hello-1565047380-jw7mz 0/1 Pending 0 0s hello-1565047380-jw7mz 0/1 ContainerCreating 0 0s hello-1565047380-jw7mz 0/1 Completed 0 3s The uniqueness in the pod names is that middle number. That looks like an epoch to me, and this can be converted into a human readable time. That’s a neat detail.
We can also have a look at the evolution of the jobs itself. kubectl get jobs --watch gives us some detail here.
hello-1565047320 0/1 0s hello-1565047320 0/1 0s 0s hello-1565047320 1/1 5s 4s hello-1565047380 0/1 0s hello-1565047380 0/1 0s 0s hello-1565047380 1/1 4s 3s We can see that our podname is just the job-name plus a random string at the end. The epoch is appended to our jobname.
Conclusion
In this part of the CKAD series we dove into deployments and jobs. Let’s stop creating individual pods from now on, and only create deployments or jobs.
Two more topics remaining, we’re almost at the finish!