I’m a huge fan of GitHub Codespaces. Codespaces deliver a fully powered and customizable Visual Studio Code (VS Code) instance in the browser. I’ve started using Codespaces recently to do my Covid analysis. It’s a great tool because I don’t need to install anything locally, I can simply use Codespaces straight from the browser.
Codespaces open up a lot of possibilities. It enables people without a powerful development machine to get access to cloud-based resources to develop using a fully powered machine. For open-source projects, it would make it more accessible for new contributors to add code to a project. New contributors could focus on writing code immediately, with no need to configure a local workstation.
Wouldn’t it be nice if we could connect to Codespaces from within VS code, without having to use the browser? That’s what we’ll explore in this post: How to connect GitHub Codespaces to a local Visual Studio Code. There are 2 steps involved:
- Install and configure the Codespaces extension
- Connect to and run the Codespace locally
To get started, you’ll need the following:
- Be accepted in the GitHub Codespaces beta.
- Have VS Code installed locally
If you have those two things, let’s get started:
Install and configure the Codespaces extension
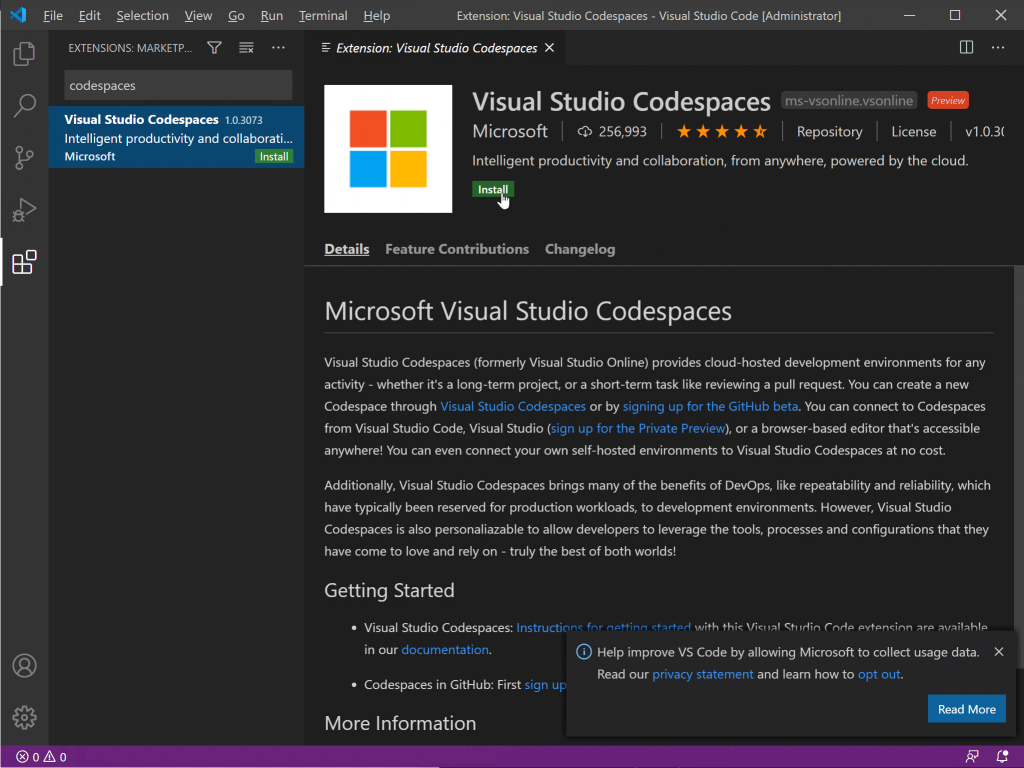
The first thing that’s required is to install the Codespaces extension. Look for the “Visual Studio Codespaces” extension in VS Code and install it. (Don’t worry, the Visual Studio Codespaces extension works with GitHub Codespaces).
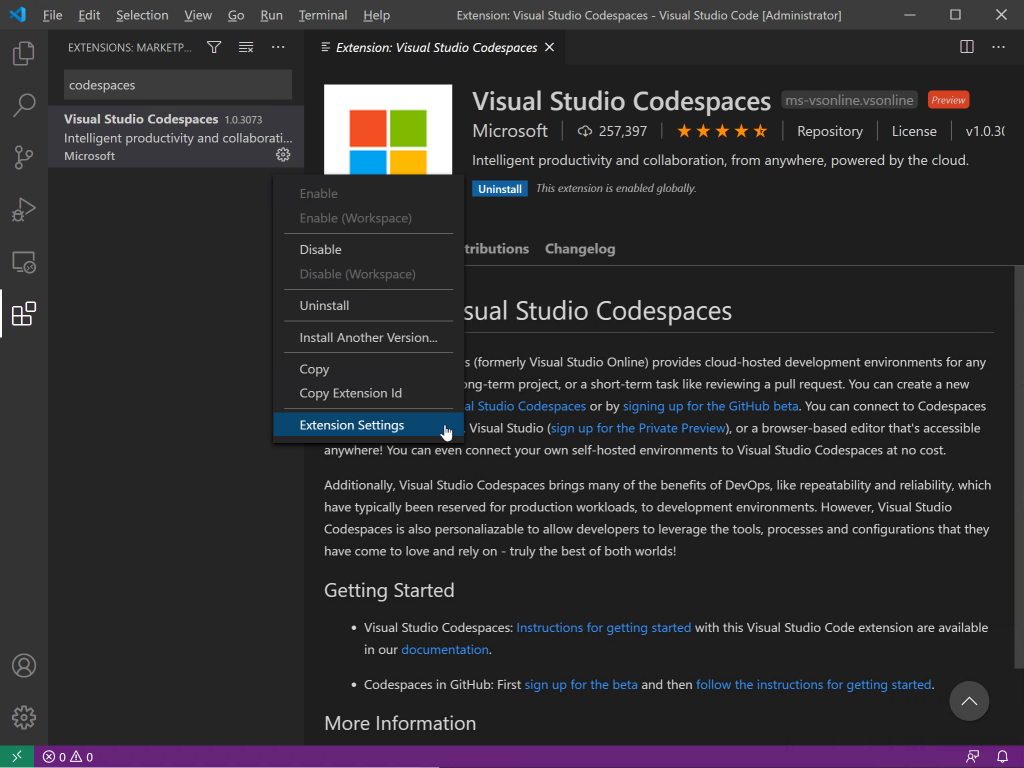
Next, the extension needs to be configured to work with GitHub. To do this, once the extension is installed, open the settings window:
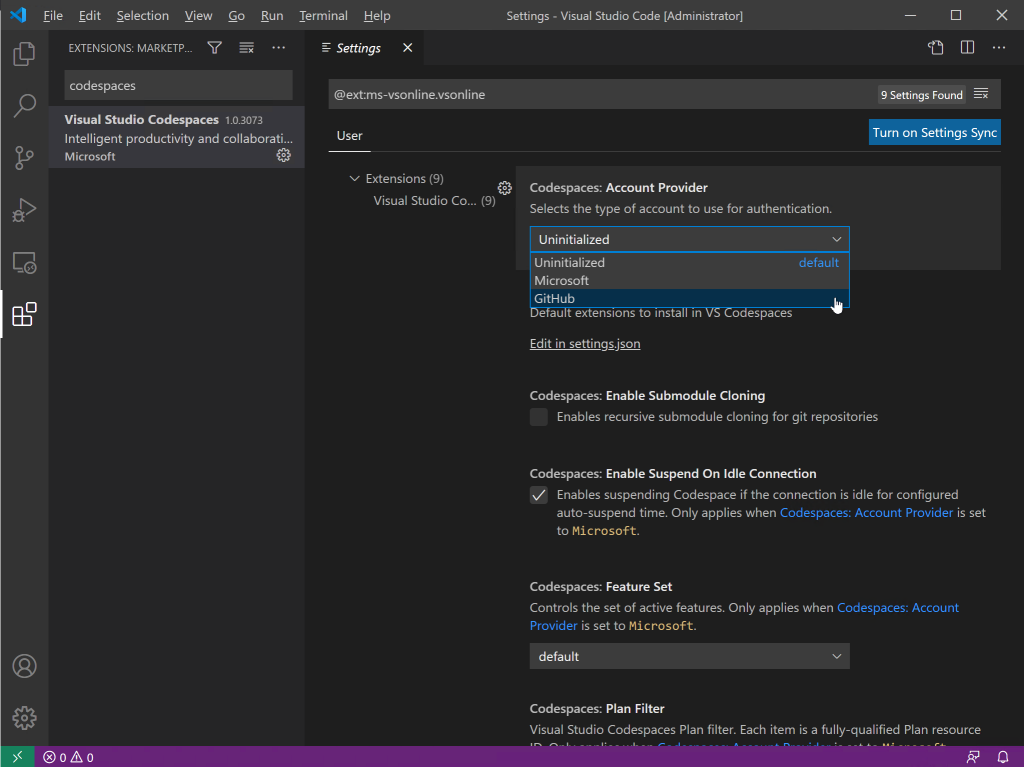
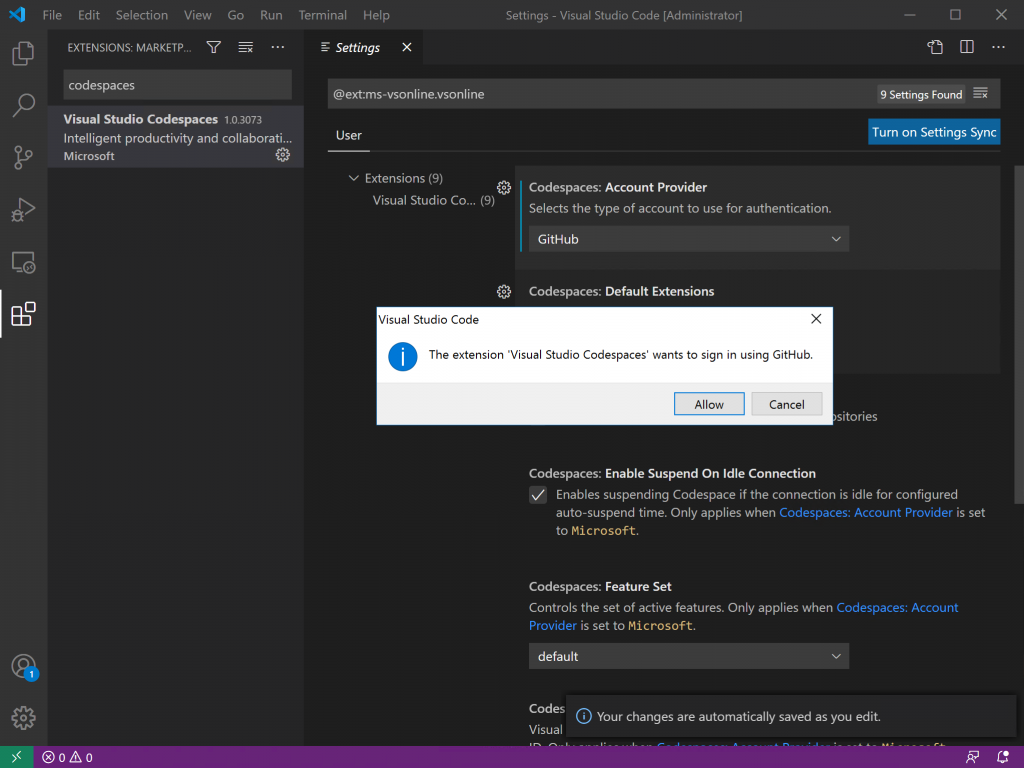
In the extension settings, configure the account provider to be GitHub:
Once you hit the GitHub button, you’ll be prompted to log in. Log into GitHub to connect to GitHub:
Once you’re logged into GitHub, this will link back to VS Code, and configure the extension. With the login done, you can start using your codespaces!
Connect to and run the Codespace locally
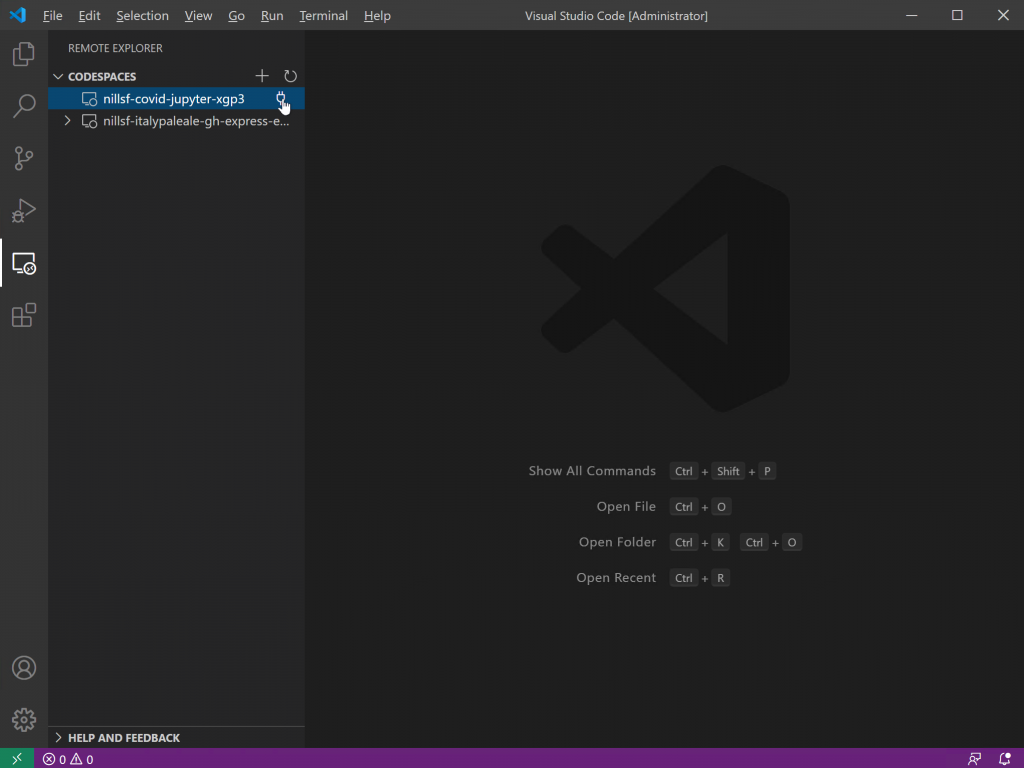
Now that the extension is configured, we can connect to a Codespace. From VS Code, you can either create a new Codespace – or connect to an existing one. For the purpose of this post, I’ll connect to an existing one, namely my Covid-19 Codespace. To connect to an existing codespace, hover over it and hit the connection button.
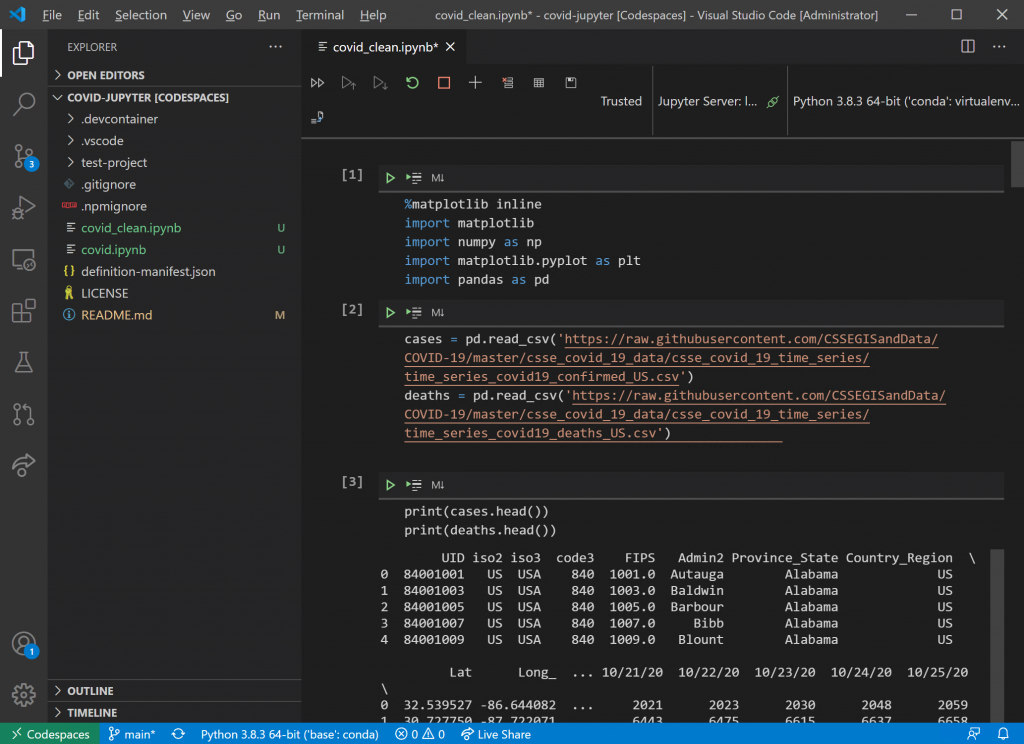
This will resume the codespace, and then connect your local VS Code to that Codespace. After about a minute, I could see all my code files, and after opening the Jupyter notebook, I could see the notebook running in my Codespace. Without having to install Python or Jupyter locally:
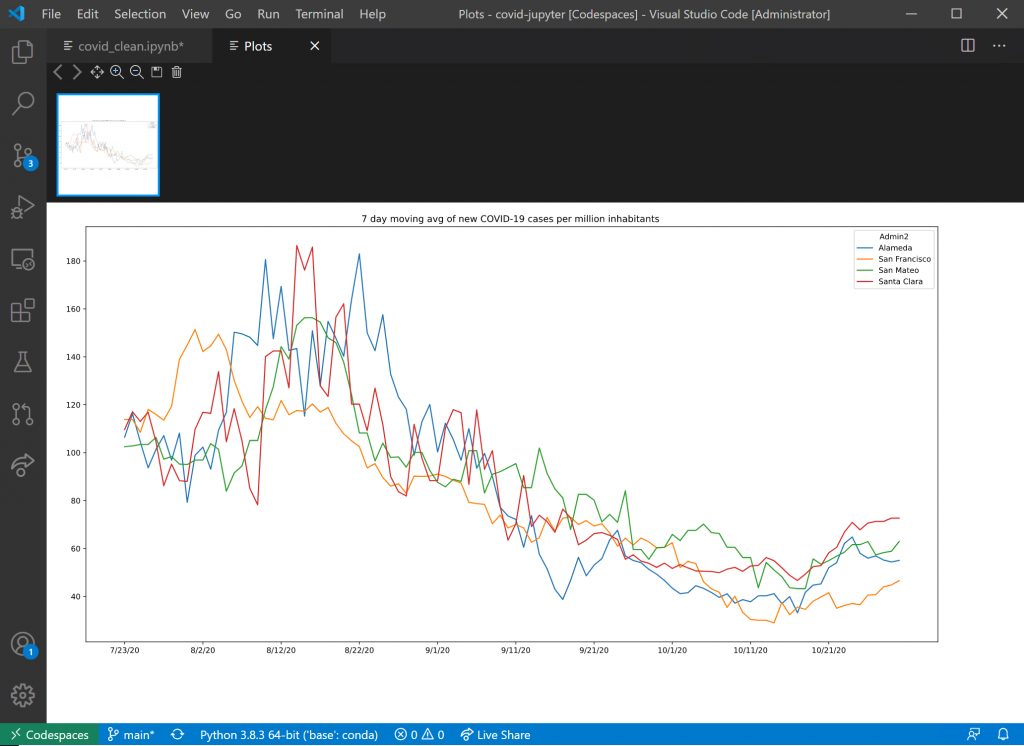
And, this allows me to look at the graphs that I’m interested in:
And that how you can connect your local VS Code, to a remote codespace.
Summary
It is actually pretty amazing how easy it was to connect a local VS Code to Codespaces. Great job by the engineering teams in making this a great experience. Once Codespaces become more common, I can see this really benefit the open-source community. With a Codespace configured for a project/repo, it would be so much easier to add contributions. No need to configure your own machine with all the binaries/tools required. You can get started by forking the repo, opening a codespace, and quickly start contributing code.
Great times ahead.