
Helm v3 recently became generally available. This looks like a great time to discover what Helm can help you do in your journey building cloud-native applications.
I’ve been playing around with Helm charts (using v2) for a while, but I have never written a chart from zero (I typically use charts I find online and just play around with those).
For this post, we’ll first explore what Helm is, what is new in Helm v3 and then we’ll build and deploy a Helm chart to Kubernetes. As a basis for our charts, we’ll use the blue/green deployment we built a couple of weeks ago as native kubernetes YAML, and transform that into a Helm chart.
But let’s start at the beginning:
What is Helm?
Helm is called the package manager for Kubernetes. Helm helps you deploy, update and manage Kubernetes applications. For this, you write something called Helm Charts.
I like to explain Helm Charts as parameterized kubernetes YAML files. If you think about a typical Kubernetes YAML file, those files are very static. You need to go into the file and edit the file to make changes. Or you make imperative changes through edit/update.
Helm charts allow you write YAML files with certain parameters in them, which you can dynamically set. This setting of the parameters can be done through a values file or as a command line variable when you deploy the chart.
Finally, with Helm you don’t necesarily have to write Helm Charts, you can also use a rich library of pre-written Helm charts and install popular software in your cluster through a simple command such as helm install --name my-release stable/mysql
What is new in Helm 3?
In Helm 2 a component called Tiller was used in the architecture. Tiller was responsible to managing state of Helm charts in a cluster. It was a pod installed in a cluster that needed permissions on your cluster to execute the actual Helm charts. Tiller also managed the state of the installed Charts.
In Helm 3, Tiller is no longer part of the architecture. Instead of relying on Tiller for state, Helm will fetch information directly from the Kubernetes API server. The biggest benefit of this approach is that Helm will now use the user’s credentials from the kubeconfig file, and a user will only be able to deploy what he has RBAC rights to deploy.
Another benefit of this approach is that you can now have the same release names across namespaces.
So, with that knowledge, let’s first go ahead and create a dummy chart – which we’ll later update to reflect our blue-green deployment.
Getting started with Helm 3
I still have Helm v2 on my machine, and on my cluster:
helm version
Client: &version.Version{SemVer:"v2.14.3", GitCommit:"0e7f3b6637f7af8fcfddb3d2941fcc7cbebb0085", GitTreeState:"clean"}
Server: &version.Version{SemVer:"v2.14.3", GitCommit:"0e7f3b6637f7af8fcfddb3d2941fcc7cbebb0085", GitTreeState:"clean"}
As my cluster is only used for testing and experimenting, I’ll nuke Helm from my cluster, and then update my binary locally. Let’s start with removing Helm from my cluster:
helm reset --force #will remove tillerLet’s now go ahead and cleanup Helm 2 and install Helm 3.
sudo mv /usr/local/bin/helm /usr/local/bin/helm2 #keep a copy of helm 2, just in case
wget https://get.helm.sh/helm-v3.0.0-linux-amd64.tar.gz
sudo tar -xvzf helm-v3.0.0-linux-amd64.tar.gz
cd linux-amd64
sudo cp helm /usr/local/bin/helm
cd ~
helm version
#version.BuildInfo{Version:"v3.0.0", GitCommit:"e29ce2a54e96cd02ccfce88bee4f58bb6e2a28b6", GitTreeState:"clean", GoVersion:"go1.13.4"}
Let’s now get started with a demo chart. Helm can create a boilerplate template for you. Let’s have a look at what this creates for us:
helm create helmdemo
cd helmdemo
tree
.
├── Chart.yaml
├── charts
├── templates
│ ├── NOTES.txt
│ ├── _helpers.tpl
│ ├── deployment.yaml
│ ├── ingress.yaml
│ ├── service.yaml
│ ├── serviceaccount.yaml
│ └── tests
│ └── test-connection.yaml
└── values.yamlThere’s a couple of files there. We see a master Chart.yaml, we see a values.yaml file and then a couple of templates.
The actual Chart.yaml doesn’t contain much, except for version numbers:
apiVersion: v2
name: helmdemo
description: A Helm chart for Kubernetes

# A chart can be either an 'application' or a 'library' chart.
#
# Application charts are a collection of templates that can be packaged into versioned archives # to be deployed.
#
# Library charts provide useful utilities or functions for the chart developer. They're included as
# a dependency of application charts to inject those utilities and functions into the rendering # pipeline. Library charts do not define any templates and therefore cannot be deployed.        type: application

# This is the chart version. This version number should be incremented each time you make changes
# to the chart and its templates, including the app version.
version: 0.1.0

# This is the version number of the application being deployed. This version number should be   # incremented each time you make changes to the application.
appVersion: 1.16.0
The values.yaml file actually contains some meaningful configuration. Remember what I explained in the introduction here: when deploying a chart, you can specify some of the parameters either via a values file (this file) or you can set them at runtime in the command line.
# Default values for helmdemo.
# This is a YAML-formatted file.
# Declare variables to be passed into your templates.

replicaCount: 1

image:
  repository: nginx
  pullPolicy: IfNotPresent

imagePullSecrets: []
nameOverride: ""
fullnameOverride: ""

serviceAccount:
  # Specifies whether a service account should be created
  create: true
  # The name of the service account to use.
  # If not set and create is true, a name is generated using the fullname template
  name:

podSecurityContext: {}
  # fsGroup: 2000

securityContext: {}
  # capabilities:
  #   drop:
  #   - ALL
  # readOnlyRootFilesystem: true
  # runAsNonRoot: true
  # runAsUser: 1000

service:
  type: ClusterIP
  port: 80

ingress:
  enabled: false
  annotations: {}
    # kubernetes.io/ingress.class: nginx
    # kubernetes.io/tls-acme: "true"
  hosts:
    - host: chart-example.local
      paths: []
  tls: []
  #  - secretName: chart-example-tls
  #    hosts:
  #      - chart-example.local

resources: {}
  # We usually recommend not to specify default resources and to leave this as a conscious        # choice for the user. This also increases chances charts run on environments with little       # resources, such as Minikube. If you do want to specify resources, uncomment the following     # lines, adjust them as necessary, and remove the curly braces after 'resources:'.
  # limits:
  #   cpu: 100m
  #   memory: 128Mi
  # requests:
  #   cpu: 100m
  #   memory: 128Mi

nodeSelector: {}

tolerations: []

affinity: {}
Let’s now have a look at the deployment.yaml file to see an actual Helm template:
apiVersion: apps/v1
kind: Deployment
metadata:
  name: {{ include "helmdemo.fullname" . }}
  labels:
    {{- include "helmdemo.labels" . | nindent 4 }}
spec:
  replicas: {{ .Values.replicaCount }}
  selector:
    matchLabels:
      {{- include "helmdemo.selectorLabels" . | nindent 6 }}
  template:
    metadata:
      labels:
        {{- include "helmdemo.selectorLabels" . | nindent 8 }}
    spec:
    {{- with .Values.imagePullSecrets }}
      imagePullSecrets:
        {{- toYaml . | nindent 8 }}
    {{- end }}
      serviceAccountName: {{ include "helmdemo.serviceAccountName" . }}
      securityContext:
        {{- toYaml .Values.podSecurityContext | nindent 8 }}
      containers:
        - name: {{ .Chart.Name }}
          securityContext:
            {{- toYaml .Values.securityContext | nindent 12 }}
          image: "{{ .Values.image.repository }}:{{ .Chart.AppVersion }}"
          imagePullPolicy: {{ .Values.image.pullPolicy }}
          ports:
            - name: http
              containerPort: 80
              protocol: TCP
          livenessProbe:
            httpGet:
              path: /
              port: http
          readinessProbe:
            httpGet:
              path: /
              port: http
          resources:
            {{- toYaml .Values.resources | nindent 12 }}
      {{- with .Values.nodeSelector }}
      nodeSelector:
        {{- toYaml . | nindent 8 }}
      {{- end }}
    {{- with .Values.affinity }}
      affinity:
        {{- toYaml . | nindent 8 }}
    {{- end }}
    {{- with .Values.tolerations }}
      tolerations:
        {{- toYaml . | nindent 8 }}
    {{- end }}
It might be a bit difficult to read, but have a look at the image section of this deployment.yaml file:
         image: "{{ .Values.image.repository }}:{{ .Chart.AppVersion }}"
          imagePullPolicy: {{ .Values.image.pullPolicy }}
You can see that this refers to both .Values.image.repository, .Chart.AppVersion and .Values.image.pullPolicy. If we check our values file, we can see the following sections:
image:
  repository: nginx
  pullPolicy: IfNotPresent
And in our Chart.yaml we can see:
appVersion: 1.16.0So, the image that this chart will create is essentially:
         image: "nginx:1.16.0"
          imagePullPolicy: IfNotPresent
We can now go ahead and install our Chart on our cluster:
helm install helmdemo .This will output:
NAME: helmdemo
LAST DEPLOYED: Sat Nov 23 09:09:04 2019
NAMESPACE: default
STATUS: deployed
REVISION: 1
NOTES:
1. Get the application URL by running these commands:
  export POD_NAME=$(kubectl get pods --namespace default -l "app.kubernetes.io/name=helmdemo,app.kubernetes.io/instance=helmdemo" -o jsonpath="{.items[0].metadata.name}")
  echo "Visit http://127.0.0.1:8080 to use your application"
  kubectl --namespace default port-forward $POD_NAME 8080:80
If we execute those commands, we can connect from our localhost to that webserver:
export POD_NAME=$(kubectl get pods --namespace default -l "app.kubernetes.io/name=helmdemo,app.kubernetes.io/instance=helmdemo" -o jsonpath="{.items[0].metadata.name}")
echo "Visit http://127.0.0.1:8080 to use your application"
kubectl --namespace default port-forward $POD_NAME 8080:80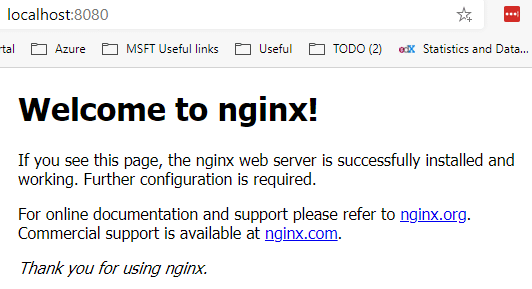
That’s enough trouble for our demo chart. Let’s now go ahead and update our blue/green deployment to be deployable via Helm:
Updating our blue/green deployment to Helm charts
To get started with updating our blue/green deployment, let’s revisit the architecture:
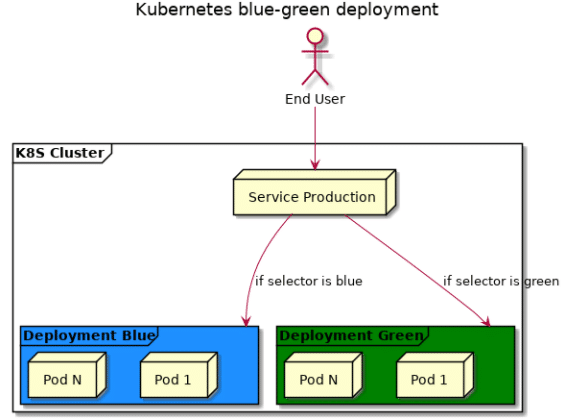
And for this we created a couple of files:
├── blue
│   ├── configmap.sh
│   ├── deployment.yaml
│   └── index.html
├── green
│   ├── configmap.sh
│   ├── deployment.yaml
│   └── index.html
├── service-prod.yaml
Looking back at this, and at the fact that we want to update this via Helm, we’ll have to change the way we create our configmap to also become part of a Helm chart. We’ll afterwards update our blue and green deployment files to also take certain inputs from the values file. Finally, we’ll update our service-prod.yaml to take in a parameter as well.
In terms of deploying a new version of the blue-green app – we’ll still do a two-step deployment. First we’ll update the deployment itself, and then we do the blue-green flip. This “wait” period is not something we’ll code into Helm, this is part of the manual process (and later of a CI/CD pipeline, but that’s a topic for later).
We’ll do a helm create blue-green to create some boilerplate Chart and values file. In what is created, we’ll delete the templates and tests via:
rm templates/*.*
rm -rf tests
We’ll update our values file to look like this, to keep track of different versions that will be running:
blue:
  version: 1

green:
  version: 1

production: blue
Let’s start at the beginning, and creating our updated configmap. We’ll create this in templates/configmap.blue.yaml
I installed a configmap first to get an overview of what the yaml should look like (just execute the configmap.sh script from before). This looks something like this:
kubectl get configmap index-blue-v1 -o yaml
apiVersion: v1
data:
  index.html: "<html>\r\n <head>\r\n  <title>Blue</title>\r\n </head>\r\n <body bgcolor=\"#11a7f7\">\r\n
    \ <h1>V1</h1>\r\n </body>\r\n</html>"
kind: ConfigMap
metadata:
  creationTimestamp: "2019-11-10T15:53:25Z"
  name: index-blue-v1
  namespace: default
  resourceVersion: "4195496"
  selfLink: /api/v1/namespaces/default/configmaps/index-blue-v1
  uid: 3acf62ff-03d2-11ea-a11b-b2bece276eec
This will boil down to useful yaml like:
apiVersion: v1
data:
  index.html: "<html>\r\n <head>\r\n  <title>Blue</title>\r\n </head>\r\n <body bgcolor=\"#11a7f7\">\r\n
    \ <h1>V1</h1>\r\n </body>\r\n</html>"
kind: ConfigMap
metadata:
  name: index-blue-v1
We’ll pass in the version via our values file. So our chart for blue will look like:
apiVersion: v1
data:
  index.html: "<html>\r\n <head>\r\n  <title>Blue</title>\r\n </head>\r\n <body bgcolor=\"#11a7f7\">\r\n
    \ <h1>V{{ .Values.blue.version }}</h1>\r\n </body>\r\n</html>"
kind: ConfigMap
metadata:
  name: index-blue-v{{ .Values.blue.version }}
And similar for configmap.green.yaml:
apiVersion: v1
data:
  index.html: "<html>\r\n <head>\r\n  <title>Green</title>\r\n </head>\r\n <body bgcolor=\"#6dc066\">\r\n
    \ <h1>V{{ .Values.green.version }}</h1>\r\n </body>\r\n</html>"
kind: ConfigMap
metadata:
  name: index-green-v{{ .Values.green.version }}
Next up, we’ll need a deployment object. As a reminder, our deployment.yaml looked like:
apiVersion: apps/v1beta1
kind: Deployment
metadata:
  name: blue
spec:
  replicas: 10
  template:
    metadata:
      labels:
        app: web-version
        color: blue
    spec:
      containers:
      - name: nginx
        image: nginx
        ports:
        - containerPort: 80
        volumeMounts:
        - name: config-volume
          mountPath: /usr/share/nginx/html
      volumes:
      - name: config-volume
        configMap:
          name: index-blue-v1
---
apiVersion: v1
kind: Service
metadata:
  name: blue
spec:
  type: LoadBalancer
  ports:
  - port: 80
  selector:
    color: blue
We’ll need to update this to take the version from a values file. e.g. deployment.blue.yaml looks like:
apiVersion: apps/v1beta1
kind: Deployment
metadata:
  name: blue
spec:
  replicas: 10
  template:
    metadata:
      labels:
        app: web-version
        color: blue
    spec:
      containers:
      - name: nginx
        image: nginx
        ports:
        - containerPort: 80
        volumeMounts:
        - name: config-volume
          mountPath: /usr/share/nginx/html
      volumes:
      - name: config-volume
        configMap:
          name: index-blue-v{{ .Values.blue.version }}
---
apiVersion: v1
kind: Service
metadata:
  name: blue
spec:
  type: LoadBalancer
  ports:
  - port: 80
  selector:
    color: blue
Finally, we’ll also turn our production-service into a Helm chart. For this, we introduced value, called production to reference which color is now in production.
apiVersion: v1
kind: Service
metadata:
  name: production
spec:
  type: LoadBalancer
  ports:
  - port: 80
  selector:
    color: {{ .Values.production }}
With our templates at the ready, we can go ahead and run our end-to-end example for a first time. We’ll install via helm install bluegreen . (this has to be executed from the directory that contains Chart.yaml)
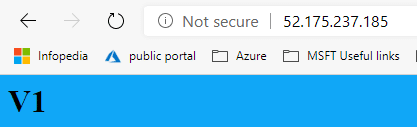
Doing a kubectl get all will show us that we have all our services and deployments running. Let’s wait a minute for our production service to get a public ip address.
Once we have a production IP address, we can see that blue is now our production service.
Let’s do an update to green via helm. This time, without touching the values.yaml file, but by setting a runtime value in helm: helm upgrade bluegreen . --set green.version=1.1
This again has no impact on our production service, which we can flip around with yet another helm command: helm upgrade bluegreen . --set production=green
Looking at our production service now, this doesn’t look like expected.
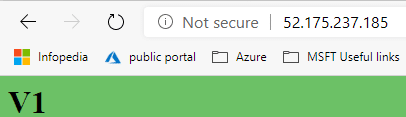
This isn’t version 1.1 anymore. What happened here is that Helm reverted to the values file, as we no longer set v1.1 via the command line. We can force Helm to use server values via the flag --reuse-values.
Let’s try this out by updating blue:
helm upgrade bluegreen . --set blue.version=1.1
kubectl rollout status deploy/blue #wait for blue to finish deploying
helm upgrade bluegreen . --set production=blue --reuse-values
With all of this done, we have turned our blue-green deployment into Helm charts, and now have a better update mechanism.
Conclusion
During this blog post we explored Helm v3. We updated our deployment for blue-green deployments into Helm charts. I personally learned two important gotchas with Helm:
- Don’t dynamically name object names in Kubernetes is you don’t want Helm to delete the old ones. In the first passthrough of this post, I didn’t have a deployment.green.yaml and a deployment.blue.yaml, I just had a deployment.yaml and passed in the color via a value. That worked well to deploy just one, but to deploy the other color, Helm actually deleted the other color. So, we ended up with both a blue and a green deployment and configmap.
- Be careful with setting values via the command-line and use
--reuse-valuesto avoid mistakes.
With that out the way, we can now use these Helm charts to do a blue-green deployment from a CI/CD pipeline.