I am not a developer. I’m more of an infrastructure person, who delves into development sometimes.
As part of a hackathon last week, my team and I ended up needing to do branches in git, and I had to shamefully admit that I always check-in to master. Most developers will be shooting me the same look through their screen as my team shot me when I said that.
Well, that will never happen again! Let me show you what I learned about branching in Git, and how to do it.
Why branching in git
Branches in git allow you to protect your code. When you start working on a new feature and you create a new branch, you can work in isolation from your team. This means, if you make changes in your branch that break something, other people are not impacted by this.
The moment your work is done, you need to open a pull request to the master branch. Opening a pull request, will allow your branch to be merged with the master branch. Once your pull request actually gets merged, everybody who creates a new branch will use the work you did and merged into master.
I don’t want to in depth on different branching (and merging) strategies, but if you’re looking for more, these two pieces of information helped me learn about branching:
How to create, work on and merge a branch
For this demo, I’ll create a branch of my blog repo in Github. I use this repo to share code examples I build for demos.
So, let’s create a local branch first.
git checkout -b "branching_blog_post"The above command will do two things. First it will create a new branch locally called branching_blog_post, and secondly will switch my local git to make all changes to that directory.
Now, we’ll do some work in that branch. I’ll create a new directory, and add a README.md file.
Now, we can use the git status command to show us what the difference is between what is on my file system and what is checked in to git.
git status
On branch branching_blog_post
Untracked files:
  (use "git add <file>..." to include in what will be committed)

        branching/

nothing added to commit but untracked files present (use "git add" to track)
Now, we can use the git add command to add those folders and files to our repo.
git add branching
git status
On branch branching_blog_post
Changes to be committed:
  (use "git reset HEAD <file>..." to unstage)

        new file:   branching/README.md
Now that we have changes to be committed, we can commit those to our local branch.
git commit -m "added README.md"Now, an important remark here. All changes are still local to my local git repo. They haven’t been pushed up to github.com yet. Commiting locally can help you keep track of the work you’ve actually done and give you the ability to rollback. To make our changes appear in github.com, we’ll need to use git push. However, out github repo doesn’t have this branch yet. When executing a simple git push, git will give you a command explaining how to make and push those changes to github.com
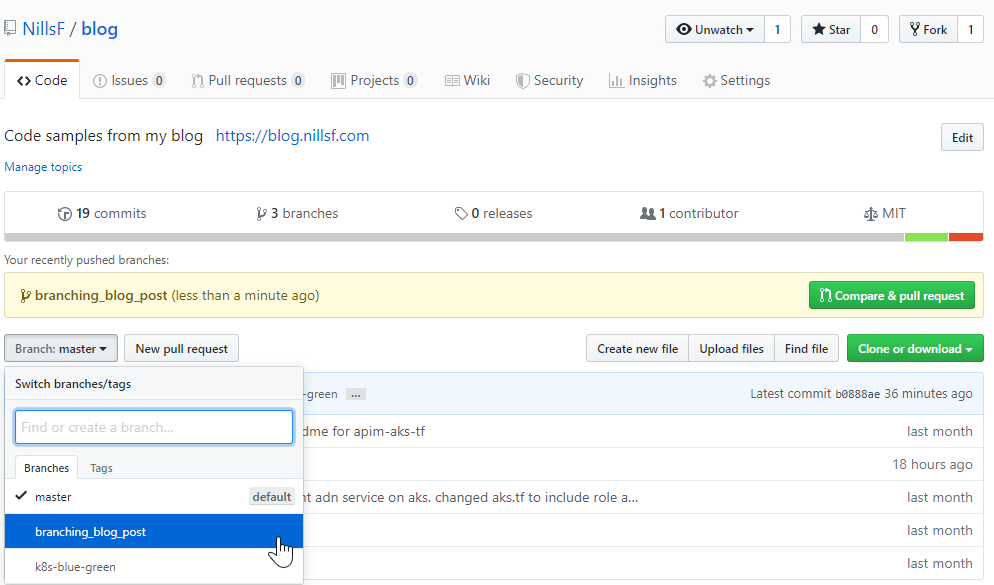
git push --set-upstream origin branching_blog_postNow, we have our branch in github.com. We can switch to that branch to actually see that branch in github.com – and we can create a pull request on github.com to compare code and try to merge into master.
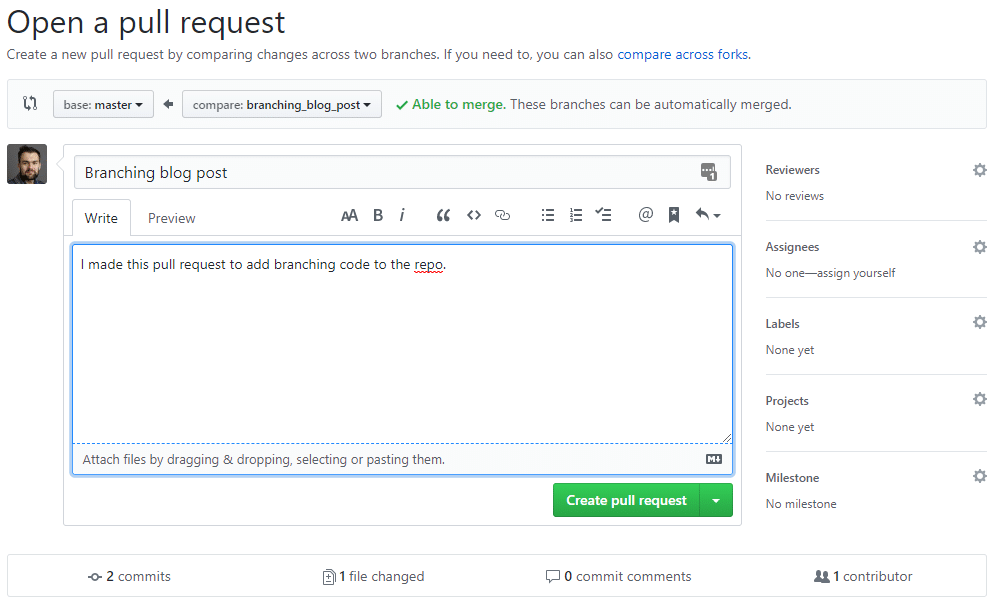
We’ll now use the github.com website to make a pull request and merge into master. We’ll git the Compare & pull request button in the visual interface to do this. The interface is self-explanatory. You give the right level of information, and you create the pull request.
Now, in our example this is just text. In real projects you typically see a PR build happening now to make sure that your PR succeeds a build definition and can pass certain tests. You can also assign mandatory code reviews on a PR, to ensure your code is up to standards. But in our demo, nothing of that is implemented.
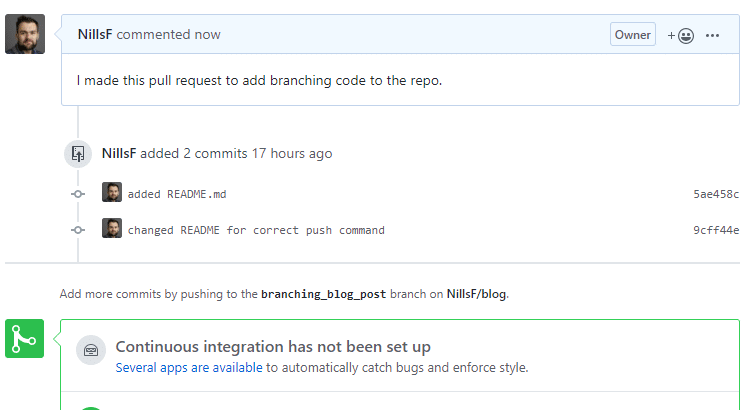
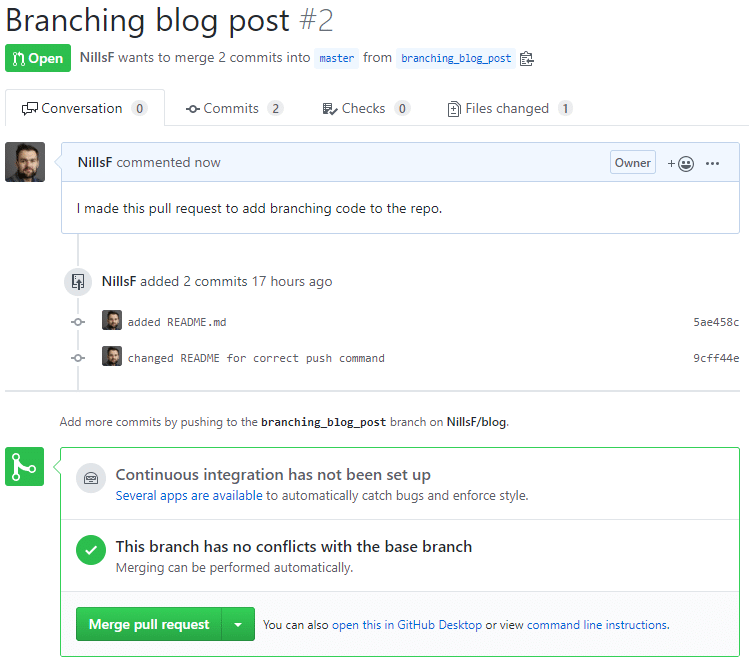
And finally, we can do the actual merge. Again, in real life people can make comments and ask you to make changes to your PR, but in our demo we’ll simply merge.
Now, your branch is merged into master. Typically, you would now go ahead and delete the branch. For new work, you’ll create a new branch anyway.

Conclusion
Branching in git enables you to make changes to code without impacting your colleagues and keeps you code clean. In this post, we walked through a simple example of doing git branching. We used the command line to create and push the branch, and used github.com to merge the branch into master.